

Sometimes you have to, for some reason need to change the game folder location. This can be due to multiple reasons, including not enough space on that particular hard drive, or maybe you want to speed up the game loading time and move the game to SSD. Our today’s guide talks about such a scenario. Today we will be moving a game called overwatch to another drive easily. This How to Move Overwatch to Another Drive guide covers all the essential things you need to know on How to move overwatch to another drive and various issues you can face if it is not moved correctly.

Possible Issues That May Occur if the Folder is Not Moved Correctly
Usually, changing the location of a game folder is not such an easy task. You can’t just move the folder to a different location and start running the game, it will result in various errors like the launcher not being found, or if you manage to launch the game, it will crash. You can also get missing file errors as well. Although you can download the game from the start, it is a long process, plus you will also lose all your saved data.
- Launcher not found
- The game will crash
- Missing files error
So by going through the above points, you must know all the issues you can face. However, the Battle.net launcher allows you to move the game to a different one so that you face no issues.
Steps on How to Move Overwatch to Another Drive Using Battle.net Client
If you have decided to change the location of the overwatch folder, it is not an easy task to accomplish. That is why we have put together this easy-to-follow How to Move Overwatch to Another Drive guide. In this section, we have covered all the steps on How to move overwatch to another drive quickly and without facing any errors or crashes.
Furthermore, if you are wondering if you have any other game that you have downloaded using the battle.net client and can the below steps apply to that game. Well, the answer is Yes. You can use these below methods on other games as well but make sure that they are downloaded using the battle.net client.
- STEP 1. While you are on the desktop, launch the Battle.net client
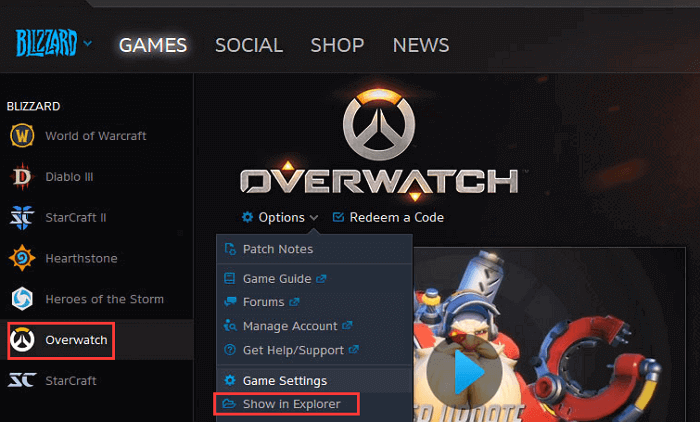
- STEP 2. Once the client is opened up, look on the left, you can see all your installed games, locate Overwatch
- STEP 3. Now right-click on it and choose the show in the explorer option
- STEP 4. You will be directed to the installation folder of the game, now right-click on the game folder
- STEP 5. Choose the cut option and head to the desired location where it will move. Right-click and choose paste
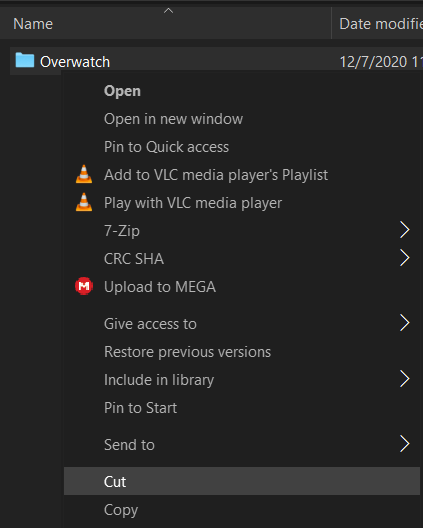
- STEP 6. In case you want to move it to another disk, follow the same step
- STEP 7. Once the folder is copied thoroughly, run the battle.net client
- STEP 8. Now firstly, uninstall the Overwatch; once done, reinstall it and point it to the new location
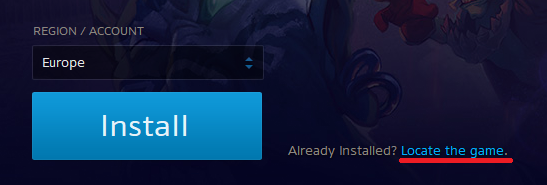
- STEP 8. As soon as you hit the install button instead of downloading or installing, you will see the Update process going on
- STEP 9. Let this process complete. Once it is completed, you can run the game without any issues
Conclusion:
The above How to Move Overwatch to Another Drive guide has covered all the essential steps required to move overwatch to another drive. The process is straightforward and can be completed in a few minutes.
We hope that you have moved all the game files and that the game is working fine too. Follow us for more guides on How to Move Overwatch to Another Drive games and other gaming-related stuff. Thank you!


 What is the Lifespan of an SD Card?")


